

Installing Ubuntu Server on the StarFive VisionFive 2
A Step-by-Step guide to installing Ubuntu on RISC-V
Software Engineer and Team Leader with a robust background in CI/CD, automation, developer tooling and proven problem-solving expertise. Committed to combining technical knowledge with a product management mindset to drive goals and product improvements during the development process. Consistent record of achievement building and integrating automation to facilitate seamless CI/CD pipelines, leading to improved time-to-market.
In the evolving landscape of computer architectures, bringing familiar operating systems to new platforms presents a unique set of challenges. A recent endeavour of mine involved installing Ubuntu Server on the StarFive VisionFive 2 RISC-V board.
Unlike the straightforward installation process we're accustomed to with more mainstream architectures, this task required delving into the nuances of UEFI bootloader configurations and intricately managing the board's boot process.
This blog post is a deep dive into that journey, aiming to demystify the steps needed to achieve a stable and functional Ubuntu setup on this emerging architecture.
📋 Prerequisites
⚠️ Before you begin, your VisionFive 2 board will need to be running the latest firmware. For a guide on how to do this, check out my previous blog post ⚠️
Hardware you will need:
A MicroSD card (8GB+)
NVME SSD (installed on the underside of the VisionFive 2 board)
USB to UART dongle
Files:
- Ubuntu Server Installer (choose the StarFive VisionFive 2 option, then download the "live installer"
✅ Board Setup
Flash the installer to the MicroSD card using Etcher and insert it into the MicroSD slot of the board.
Set the DIP switches to set the Boot Mode to Flash
RGPIO_1-> 0RGPIO_0-> 0
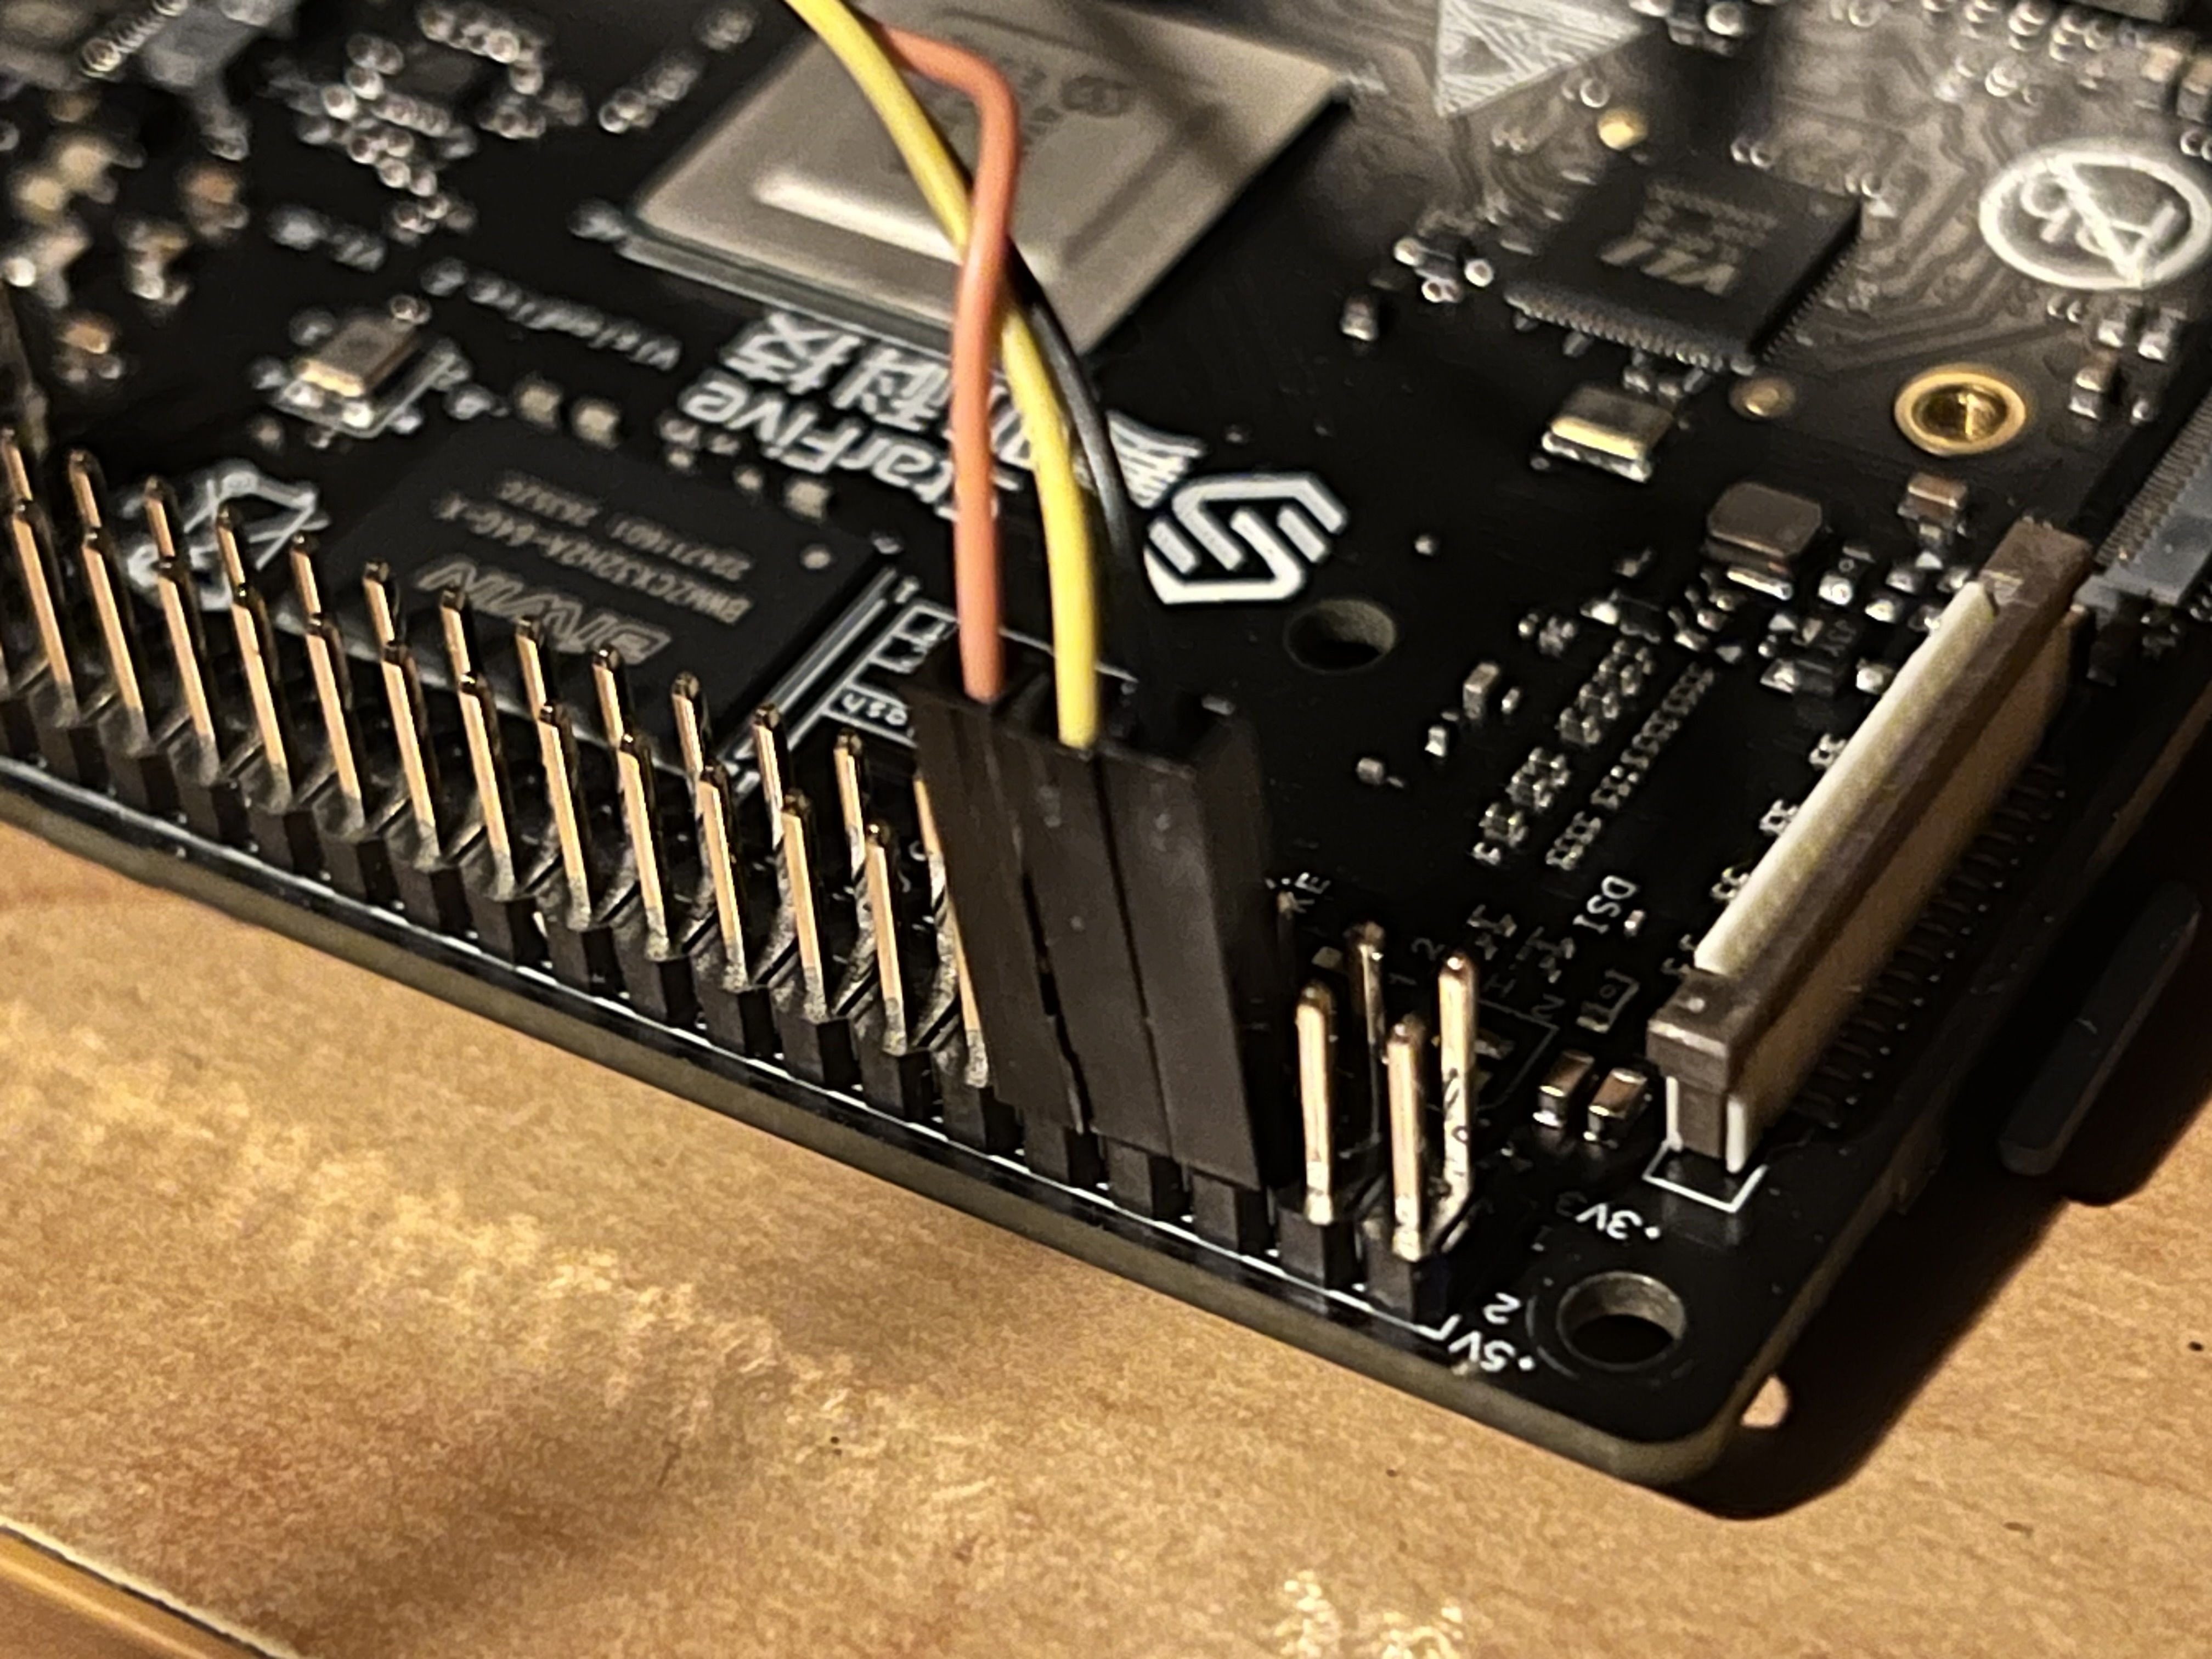
Finally, set up the UART to USB connection. I have been using the Raspberry Pi Debug Probe which works great. Connect the UART leads to the board as follows:
Pin 6 ->
GNDPin 8 ->
RXPin 10 ->
TX
Next, you need to connect to the serial terminal. If you are using macOS for example, the serial device will show with a prefix of tty.usbmodem, so you can search for it with the command:
ls /dev | grep tty.usb
Then initialise a connection to it using picocom:
sudo picocom -b 115200 /dev/tty.usbmodem2112402
Now we are ready to install Ubuntu!
👢Booting the Ubuntu Installer
To successfully boot the installer on the StarFive VisionFive 2 board, we must first identify the appropriate MicroSD Card and manually load essential files using U-Boot commands. Unlike more conventional systems where this process might be automated, the Ubuntu Installer for this specific RISC-V architecture requires direct intervention through the serial console. This step is crucial for initiating the installation process.
Firstly, power on the VisionFive board and interrupt the boot process when we see the following:
Hit any key to stop autoboot: 2
We start by listing all available memory cards with mmc list to see what options we have:
StarFive # mmc list
sdio0@16010000: 0
sdio1016020000: 1
In this case, we can see two devices listed; however, only one will be the MicroSD card with the installer on it. We can use the part list command to probe the device for partitions, and from there, determine which device and partition we need.
Let's examine the first device:
StarFive # part list mmc 0
Card did not respond to voltage select! : -110
Any time you see Card did not respond to voltage select! : -110, this generally means the device does not exist, or is not valid. So in this case we need to inspect the device with ID 1:
StarFive # part list mmc 1

Partition Map for MMC device 1  --   Partition Type: EFI

Part    Start LBA    End LBA        Name
    Attributes
    Type GUID
    Partition GUID
  1    0x0000a000    0x0003efff    "EFI System"
    attrs:    0x0000000000000000
    type:    c12a7328-f81f-11d2-ba4b-00a0c93ec93b
    type:    system
    guid:    df2030ee-9281-40ba-8e38-027c9f37917e
  2    0x0003f000    0x0063efff    "Live Media"
    attrs:    0x0000000000000004
    type:    0fc63daf-8483-4772-8e79-3d69d8477de4
    type:    linux
    guid:    4b987a45-c7ad-4804-9048-717d7d37d6b0
  3    0x00000022    0x00000821    "loader1"
    attrs:    0x0000000000000000
    type:    5b193300-fc78-40cd-8002-e86c45580b47
    guid:    ad54bbfb-4527-4681-8f6e-fa7ef471109f
  4    0x00000822    0x00002821    "loader2"
    attrs:    0x0000000000000000
    type:    2e54b353-1271-4842-806f-e436d6af6985
    guid:    3a71d22e-655d-46a6-99db-66c67ea264a1
  5    0x0063f000    0x0e81f7ff    ""
    attrs:    0x0000000000000000
    type:    0fc63daf-8483-4772-8e79-3d69d8477de4
    type:    linux
    guid:    84bc9b76-b57e-4fa4-9367-cef404541690
We are looking for the EFI System partition, which in this case is partition number 1 of device 1
Next, we load a crucial hardware configuration file called the Device Tree Blob (DTB) from the the EFI Partition of the MicroSD Card (mmc 1:1) into the system's memory using the load command as below:
load mmc 1:1 $fdt_addr_r dtb/starfive/jh7110-starfive-visionfive-2-v1.3b.dtb
Following that, we also load the RISC-V Linux kernel, located in an EFI file, into memory using the load command:
load mmc 1:1 $kernel_addr_r EFI/boot/bootriscv64.efi
You will know the load command has run successfully if you see a message in the format of 12345 bytes read in 10 ms.
Finally, we initiate the boot process with the bootefi command:
bootefi $kernel_addr_r $fdt_addr_r
This uses the loaded kernel and hardware configuration file to start up the installer. This sequence of commands essentially prepares the system and directs it to boot up from the specified files located on the memory card.
If successful, after a few seconds you should be greeted with the GRUB bootloader screen:
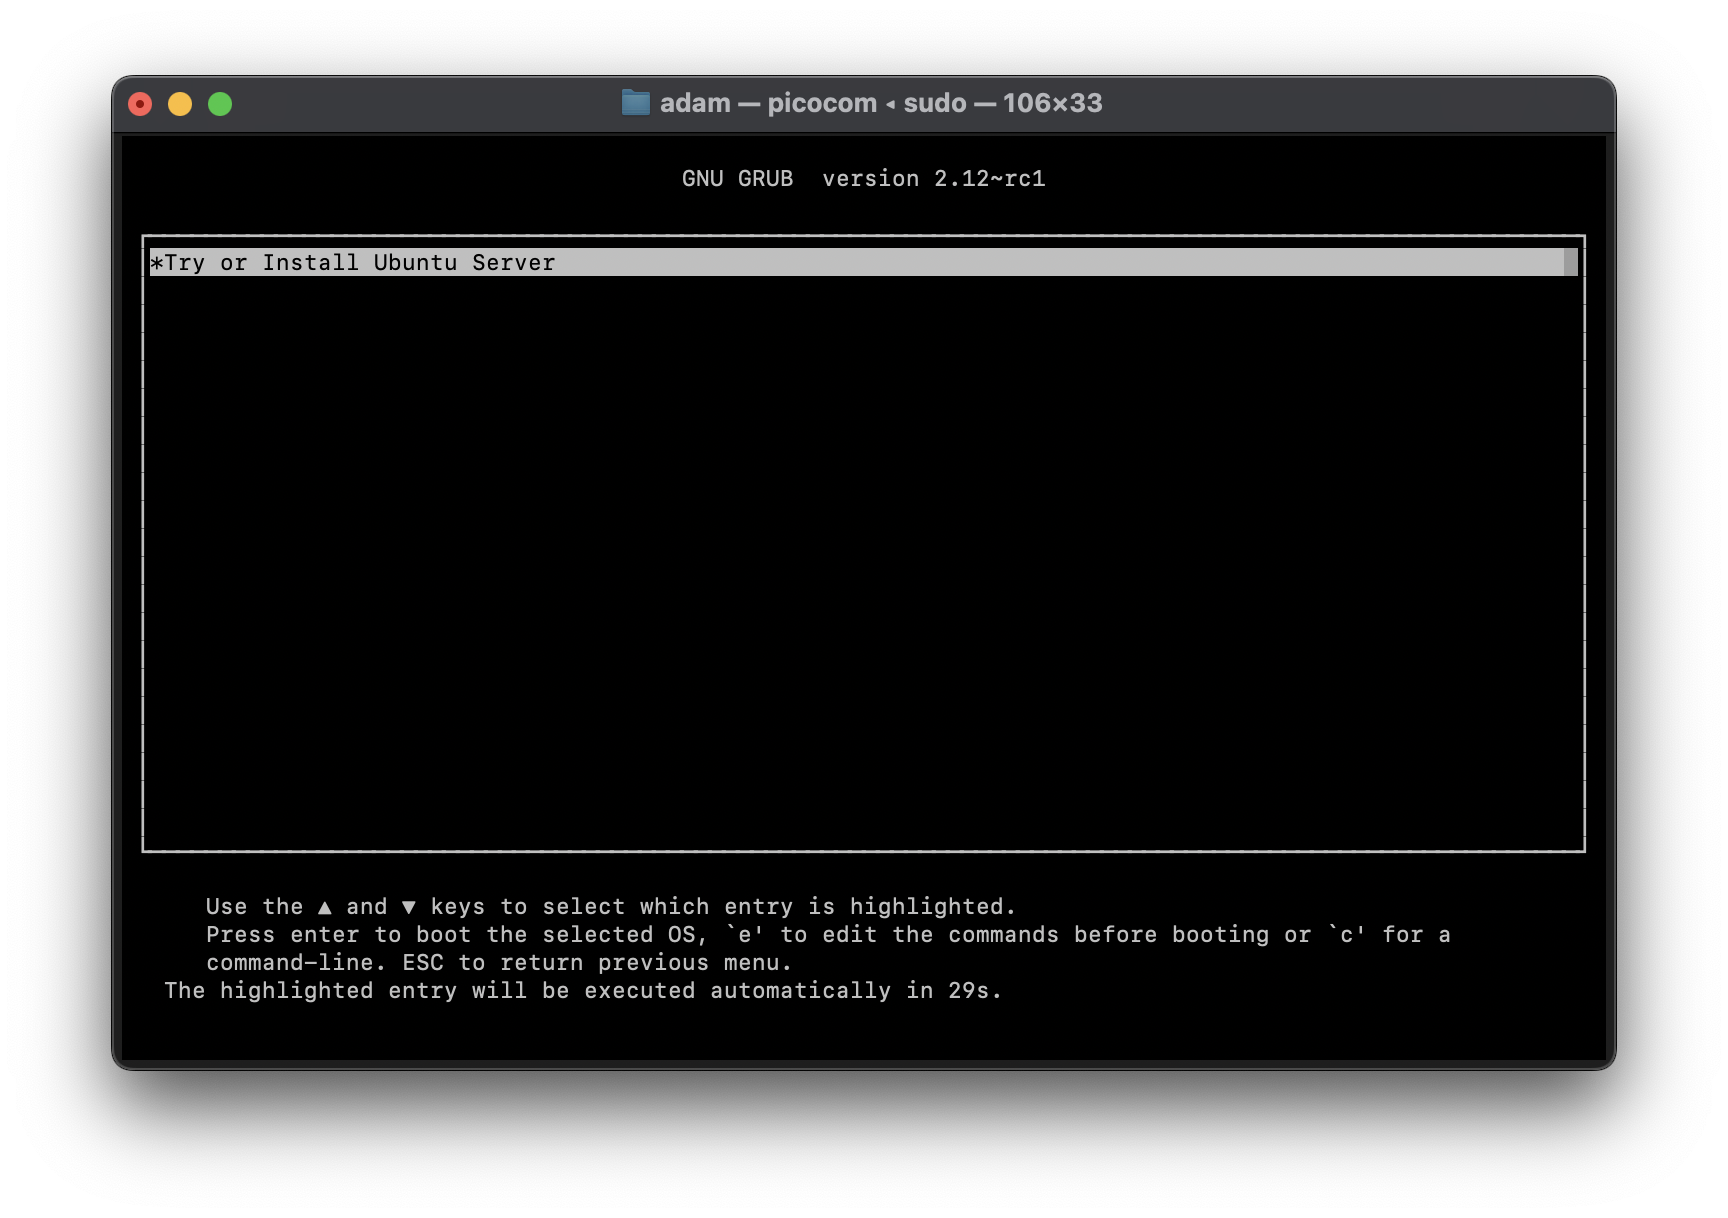
Hit enter, or wait 30s, to proceed to the installer.
⚙️ Running Through the Installer
The installer can take a few minutes to run through the boot process and can, at times, appear to hang, but just let it run and it will eventually show you the following screen:
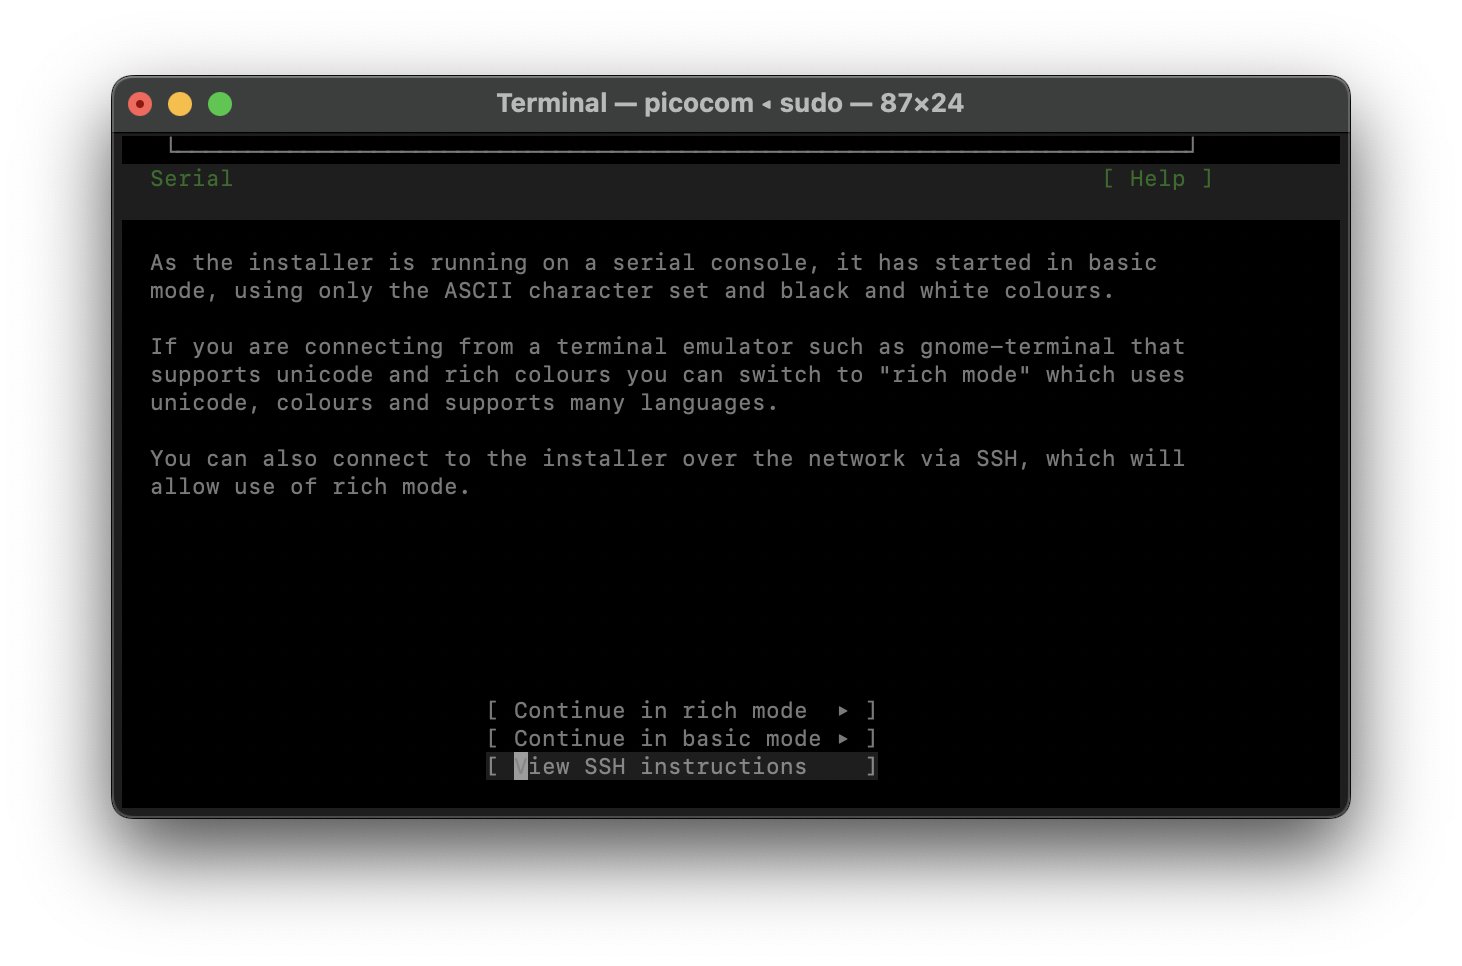
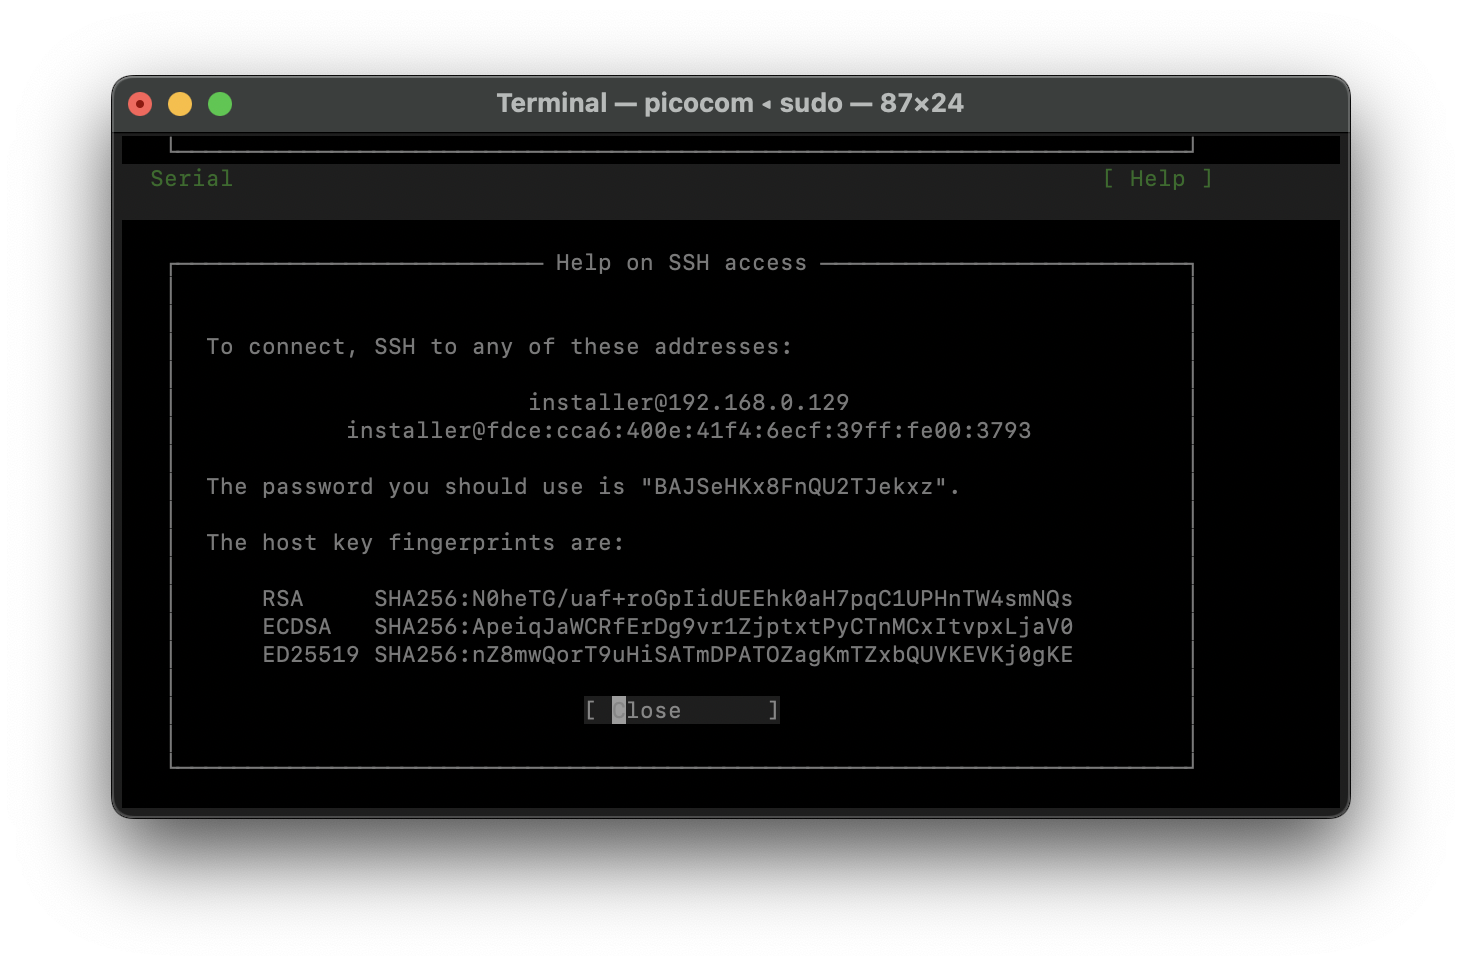
From this menu, you can continue working with the installer via the serial console in either rich or basic mode. However, personally I found it easier, and more reliable, to use the SSH method. If you choose this method, you will be provided instructions on how to access the installer over SSH:
Once you SSH in, you will see the standard Ubuntu Server installer program:
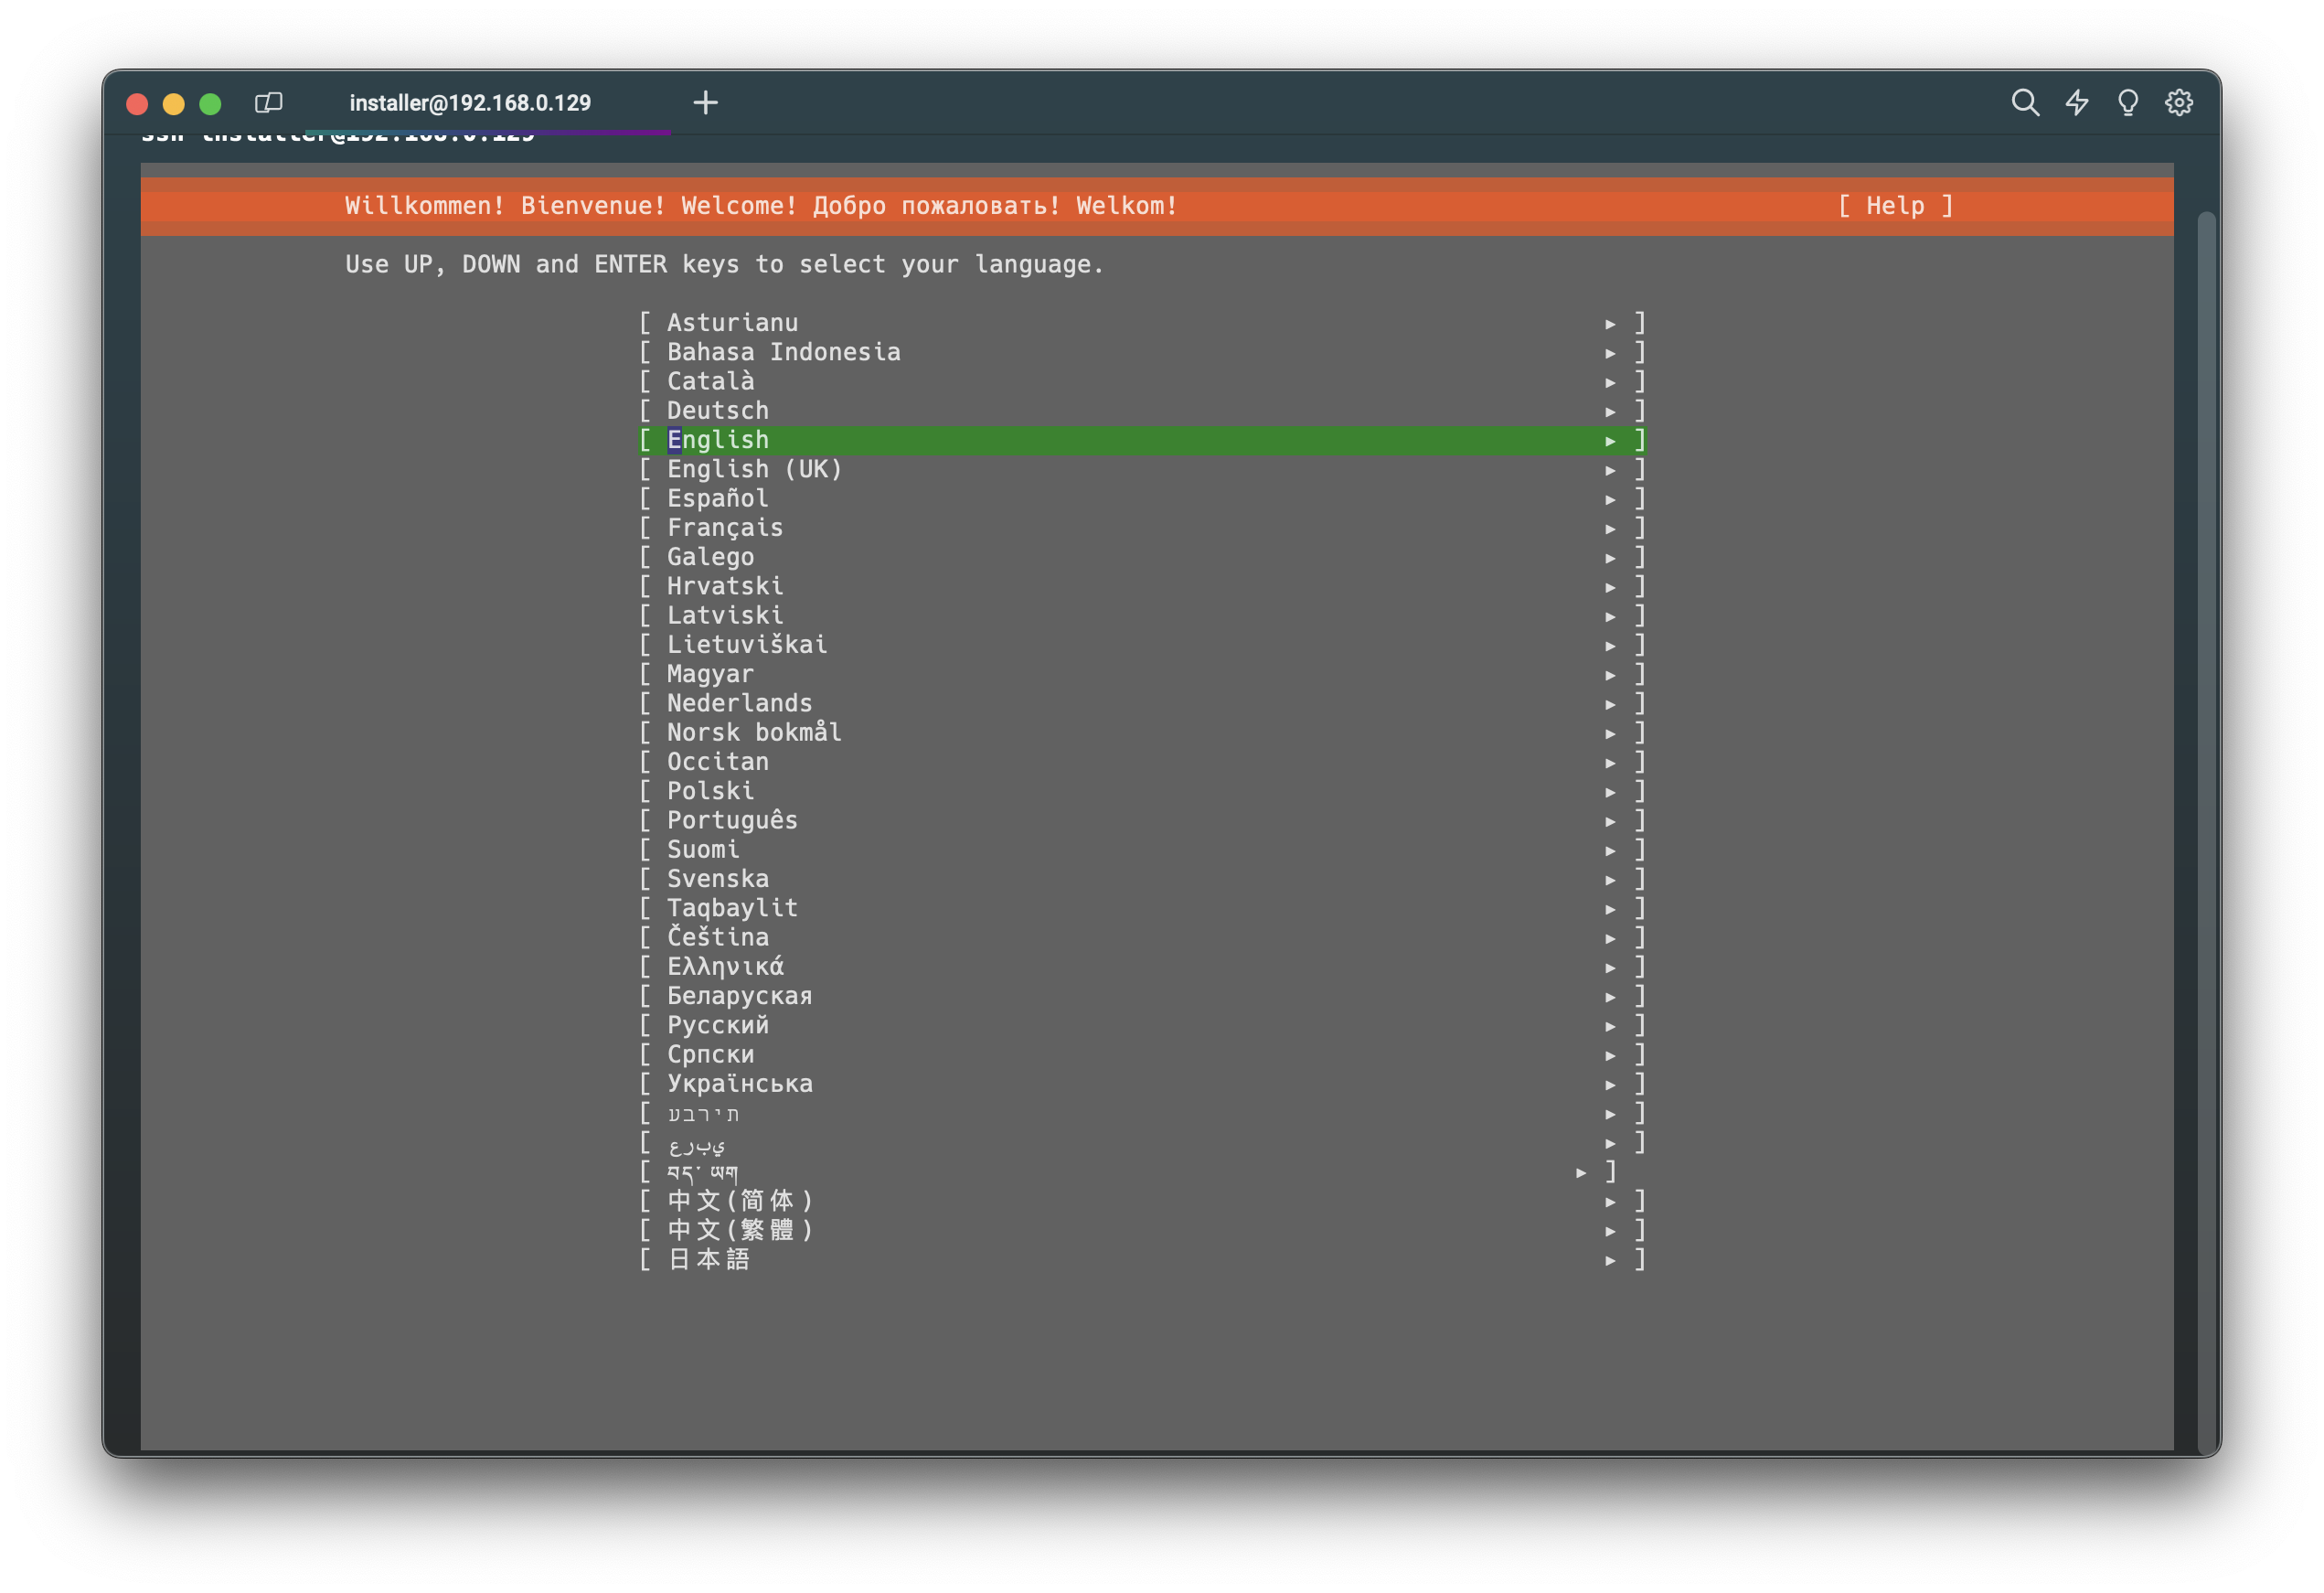
The rest of the installer is the same as any other system, so work through it and configure the installation to your needs. Be sure to install Ubuntu on the NVME drive when prompted for the disk configuration - this will likely be the default option.
Once installed, let the device reboot automatically and move on to the final stage of configuring Ubuntu on the StarFive 2 board.
🥾Booting Ubuntu on NVME
Once the board reboots, you will likely be greeted with error messages in the serial console and Ubuntu will not boot automatically from the NVME drive:
Retrieving file: /extlinux/extlinux.conf
Can't set block device
Error reading config file
Don't panic, this is normal! In most systems, the Ubuntu installer will automatically configure UEFI variables to tell the bootloader how to boot into GRUB, however, U-Boot does not allow operating systems to configure these directly. So, we will have to do this manually.
Once the board has hit the error, it should drop you into the U-Boot prompt. From here you can run commands to boot Ubuntu manually:
pci enum
nvme scan
efidebug boot add -b 0001 'Ubuntu' nvme 0:1 /EFI/ubuntu/grubriscv64.efi
efidebug boot order 0001
bootefi bootmgr
We first enumerate the PCI devices on the board with pci enum, then we use nvme scan to identify and prepare any connected NVMe drives for use, allowing the system to recognize and interact with them.
Next, we need to add a UEFI boot entry with efidebug boot add. In this case, we are setting boot entry 1 and pointing it to the NVME drive with nvme 0:1 and finally pointing it to the EFI executable /EFI/ubuntu/grubriscv64.efi.
We then set the boot order with efidebug boot order and then use bootefi bootmgr to boot the system using the UEFI boot manager. This will attempt to boot from the boot entries in the order they are set in the UEFI configuration, starting with the entry you specified (0001 in this case).
🔄 Getting Ubuntu to Boot Automatically from NVME
This above commands will boot Ubuntu fine every time, but this will not "stick" and the next time you boot the board you will face the same error and the OS will not load automatically. So just how do we achieve automatic boots?
Once again, we need to drop into the U-Boot console. This time we can set some UEFI environment variables to store the commands and run them automatically each time the board is booted:
env default -f -a
saveenv
setenv bootcmd_nvme0 "pci enum; nvme scan; efidebug boot add -b 0001 'Ubuntu' nvme 0:1 /EFI/ubuntu/grubriscv64.efi; efidebug boot order 0001; bootefi bootmgr"
setenv bootcmd 'run bootcmd_nvme0'
saveenv
First, we clear any existing variables to ensure a clean slate. Afterwards, we bundle the chain of commands into the bootcmd_nvme0 variable for use later.
Then we point the bootcmd variable to run our custom boot command. The bootcmd variable defines the series of commands that U-Boot will automatically execute during the boot process. Essentially, it's the default action that U-Boot will take unless interrupted or directed otherwise.
Finally, save the variables and you are good to go!
The support for this board and RISC-V is still early for Ubuntu and certain things, such as HDMI output, may not be functional at the time of writing this. I suggest accessing the device through the serial console first, enabling SSH and going from there.
🤔 Conclusion
In summary, installing and running Ubuntu on the StarFive VisionFive 2 board is a journey through the intricacies of U-Boot/UEFI, highlighting the adaptability required when working with emerging architectures.
By manually configuring the UEFI boot process, we can successfully navigate these hurdles and get our favourite distros up and running. This process not only underscores the importance of a solid foundational understanding of system boot mechanisms but also opens the door to the vast potential of RISC-V boards in the world of Linux computing.
Have you ventured into installing operating systems on unconventional architectures like RISC-V? Do you have experiences, insights, or questions about running Ubuntu on the StarFive VisionFive 2 or similar boards? I’d love to hear about your journey and any challenges or triumphs you’ve encountered along the way. Feel free to share in the comments below or reach out to me on Mastodon!


